|
Medinet Habu |
last update: 14.01.2010 | |
|
Description of the 18. Dynasty Temple -
Barque Shrine |
![]()

| The floor plan above shows the parts of the small temple of Amun which were built during the reign of Hatshepsut (I-----I) or Thutmosis III (I-----I). The red lines in the chapels built by Hatshepsut mark the walls which had been decorated by Hatshepsut - all other parts of the walls were either decorated by Thutmosis III or sketched by Hatshepsut but carved for Thutmosis III. |
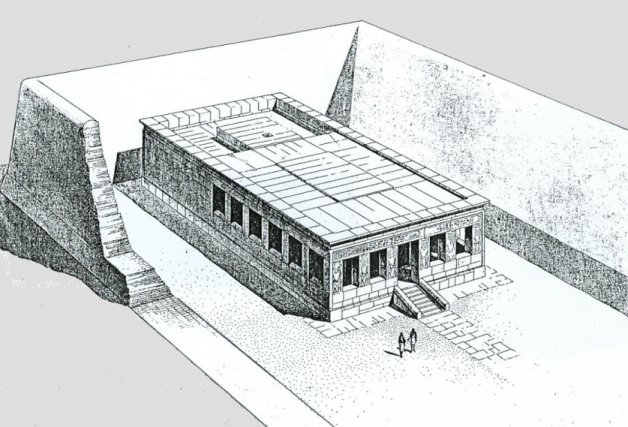
| Above a reconstruction of the small temple of Amun after the temple had been extended by Thutmosis III (Hölscher, 1930) |
| The barque shrine which was probably built completely by Thutmosis III, was,
however, in any case decorated by him. From the building which was begun in the
time of Hatshepsut only the base and a few of the lower stone layers have been
preserved. Originally, the ceiling of shrine of the 18th Dynasty was on the same
level as that of the gallery (ambulatory). If any light whatever admitted except though the doors,
it must have entered through openings in the roof. In the time of Ptolemy VII Euergetes II, Cleopatra II and III, the shrine was raised by two additional stone layers and concealed by large stone blocks. After the Ptolemaic extension light entered through slits in the ceiling. As stated by inscriptions the gates (below the west gate) of the shrine which was built of sandstone and a few limestone blocks became widened in the time of Ptolemy VII Euergetes II, Cleopatra II and III. With the exception of those on the east wall the exterior decoration during the reign of Thutmosis III remained unaltered. The decoration of the inner walls have been reworked in Ptolemaic period and whereby the reworking of the old relief were so faithfully adhered to that even a restoration text from Sethi I was rechiseled. |
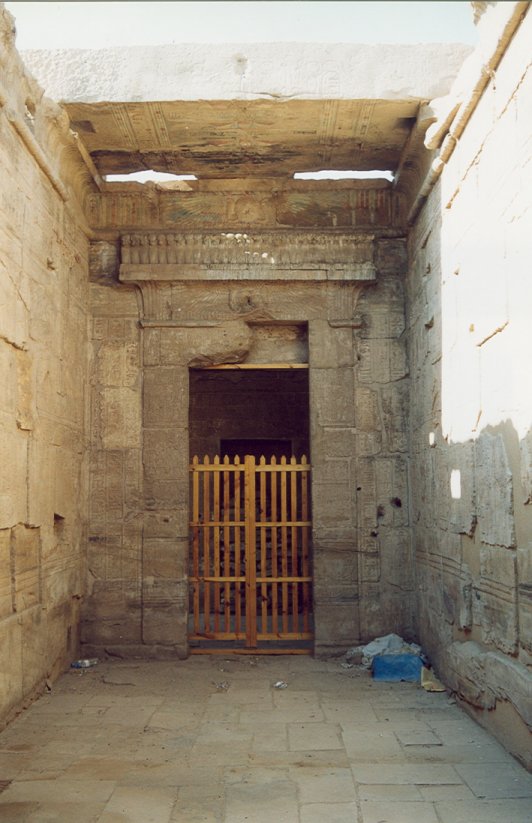
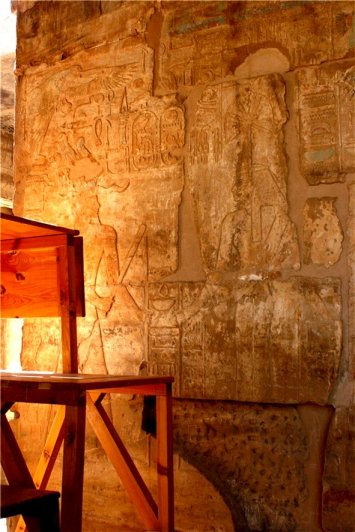
| View into the barque shrine |
| Inside and outside the walls were crowned by circulating cavetto cornices and torus moldings. Also the corners of the outside were decorated with torus moldings, however, mainly these are destroyed. |
|
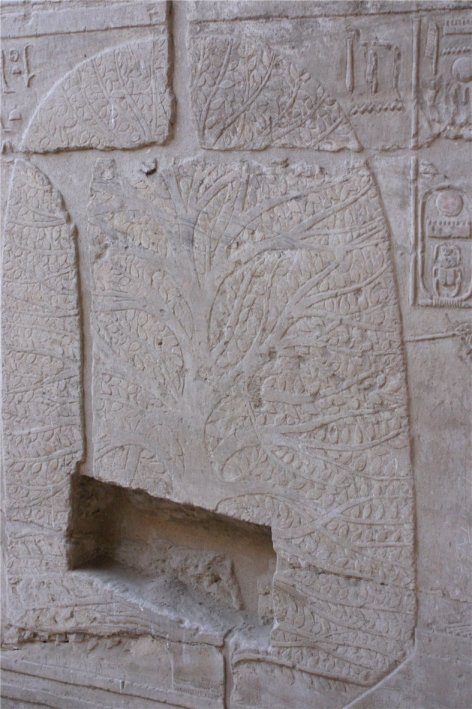
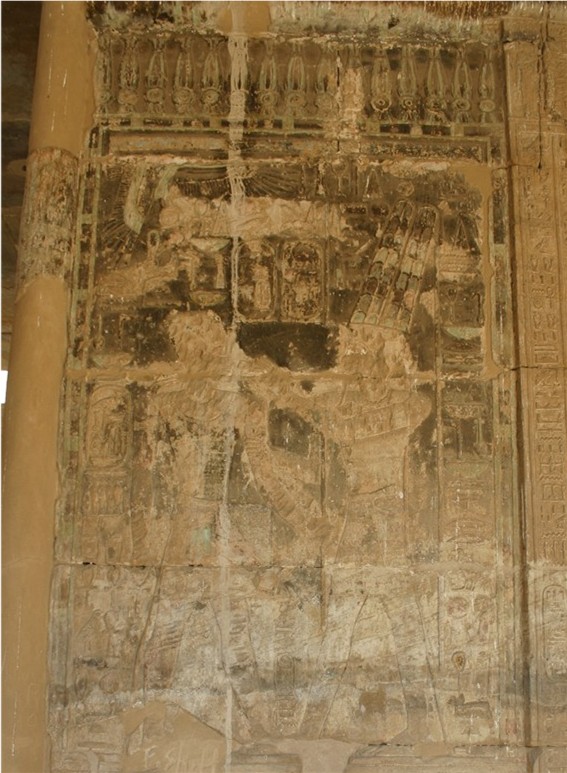
The interior of the shrine was decorated in 2 registers arranged one above the
other. The registers show Thutmosis III sacrificing before the two manifestations of
Amun, among other things on every side a scene shows the king before the the
barque of Amun. On the south side Amun inscribes with the assistance of other
gods the name of Thutmosis III on the leaves of the sacred išd tree of
Heliopolis (photo above; on the right side of the tree the writing paintbrush is
to be seen). In two representation, but on a smaller scale, appears
Merit-Ra-Hatshepsut behind the king.
|
| The decoration of the west wall dates completely into the Ptolemaic period, below the ceiling there are the already mentioned inscriptions of Ptolemy VII Euergetes II, Cleopatra II and III. |
| On the eastern side the decorations are are dated into the time of Thutmosis III (jambs) and into the Ptolemaic period (lintel). |
|
|
|
|
|
| On both outer sides of the west gate Thutmosis III is shown embracing Amun - in both cases the ithyphallic manifestation of Amun. | On both outer sides of the east gate Thutmosis III receives lives from Amun. |
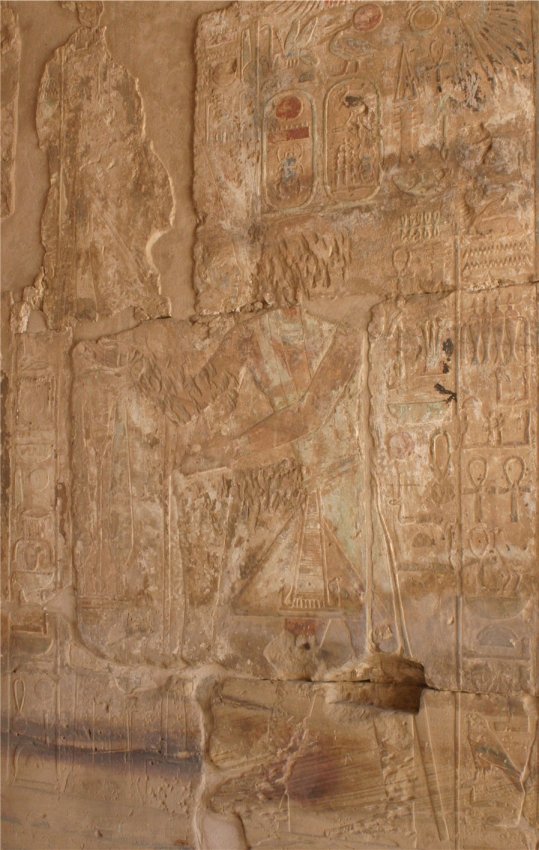
| Both exterior longitudinal walls show festal ceremonies which took place upon the founding and dedication of the temple. |
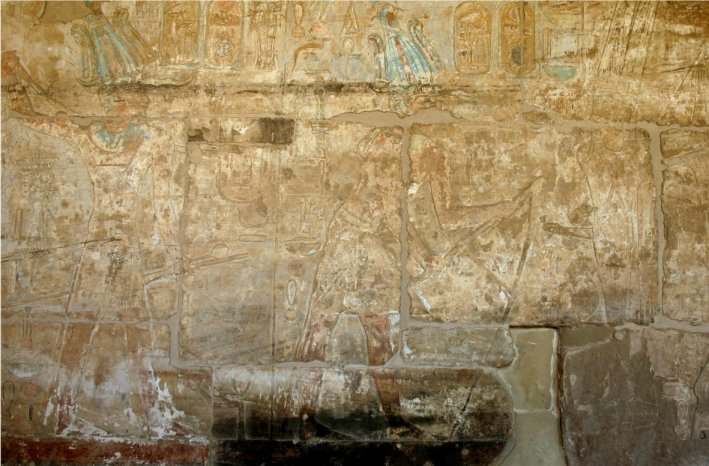
| The most eastern (left) scene of the north wall (photo above) shows Thutmosis III and the goddess Sefkhet-Abwy (a special form of the Seshat in the New Kingdom; Wilkinson, 2003) measuring the temple. The next scene to the right shows Thutmosis dedicating of the temple in Amun (no photo available). |
| The 2nd and 3rd scene show Thutmosis III "consecrating" (left) and "plowing" (middle) the area of the future temple before the ithyphallic Amun (right). |
| The 4th scene shows Thutmosis III obviously forming mudbricks! |
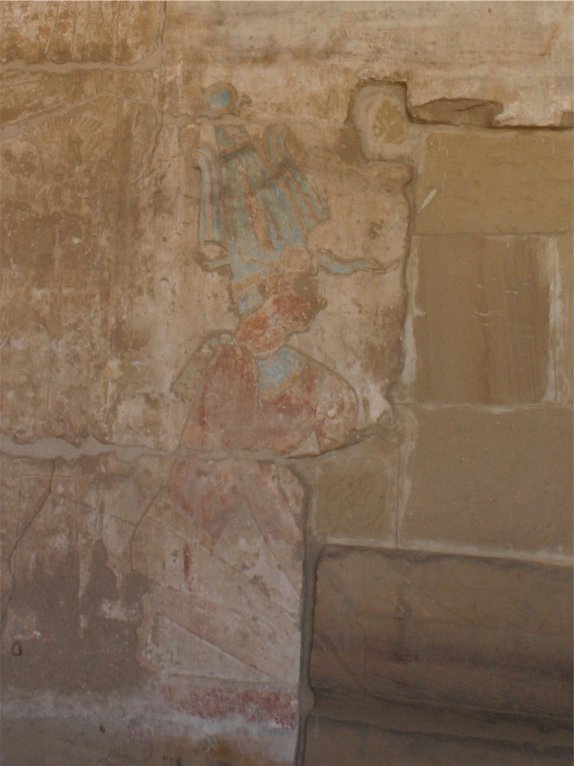
| The southern longitudinal wall shows in 5 scenes foundation ceremonies. The 1st scene (from the east to the west) shows the foundation text of Thutmosis III, in all remaining scenes a statue of the king, accompanied by a smaller figure of a dignitary, is presented to Amun. |
| Description of the |